
_edited.jpg)

Chef Secrets for Perfect Pho Bone Extraction Selecting Tools and Maximizing Flavor
- Chef Gary W Irvin II
- Aug 14
- 8 min read

Great pho starts before the first spice hits the pot. It starts with bones: their cut, freshness, collagen, marrow, and how patiently their flavor gets drawn into the broth.
Many home cooks focus on star anise, cinnamon, fish sauce, or noodles. Those matter. But the part that separates a flat broth from a deep, rounded one is bone extraction, the slow process of pulling body, aroma, gelatin, and savory depth from bones without muddying the soup.
A chef who ran broth prep in a small Vietnamese kitchen once described it this way: “The bones tell you how good the soup can be. The pot only reveals it.” That line stuck because it explains why technique matters so much. Better bones help, but careful handling makes the broth clear, fragrant, and full.
This guide walks through how chefs choose bones, what tools make the job easier, how to extract maximum flavor, and what mistakes can ruin an otherwise good pot.

Bone selection sets the ceiling for your broth
The best pho broth uses bones with different strengths. No single bone gives you everything. Marrow bones bring richness. Knuckle bones add gelatin. Neck bones and meaty bones add beef flavor. A few tendon-rich pieces can give the broth a fuller mouthfeel.
For beef pho, look for a balanced mix:
Knuckle bones
These are rich in collagen and help create body. They make broth feel rounded instead of watery.
Marrow bones
These add fat and richness. Use them with restraint, since too much marrow can make the broth greasy.
Neck bones
These carry small bits of meat and connective tissue. They add a more direct beef flavor.
Oxtail or short rib bones
These cost more, but a small amount can add depth. Use them as an accent rather than the whole base.
Tendon or shank
These help build texture and savory depth. They also give you tender pieces to serve if cooked carefully.
A chef I once watched at a family-run restaurant used a simple ratio as a starting point: mostly knuckle and neck bones, with a smaller amount of marrow bones. He said marrow makes broth taste expensive, but knuckles make it taste finished.
That is a useful way to think about it. Marrow gives richness. Collagen gives structure.
How to judge bones at the market
Choose bones that look fresh, not dry or gray. A little blood is normal, but the bones should not smell sour or stale. Ask the butcher to cut large bones into pieces small enough to fit your pot. Exposed surfaces help extraction because water can reach marrow, cartilage, and connective tissue more easily.
Look for:
Pale to deep red meat still attached in small amounts
White or cream-colored bone, not dull gray
Clean smell
Visible cartilage on joint bones
Freshly cut surfaces when possible
Frozen bones can work well, especially if that is what your local store carries. Thaw them in the refrigerator before blanching. Starting with thawed bones lets impurities release more evenly during the first boil.
If you are making chicken pho, the same idea applies. Use a whole chicken, backs, necks, wings, and feet if available. Wings and feet add collagen. The carcass adds flavor. Breast meat alone will not build a strong broth.
The right tools make bone extraction cleaner and easier
You do not need restaurant equipment to make strong pho broth. You do need tools that help you control heat, remove impurities, and strain cleanly.
The basic kit includes:
Tool | Why it matters |
Large heavy stockpot | Gives bones room to simmer without crowding |
Second pot or large bowl | Holds rinsed bones after blanching |
Fine-mesh skimmer | Removes foam, fat, and floating solids |
Long tongs | Helps move hot bones safely |
Sheet pan or cast-iron pan | Chars onion and ginger cleanly |
Spice bag or tea infuser | Keeps spices contained |
Fine-mesh strainer | Catches solids when finishing broth |
Ladle | Lets you skim and portion with control |
A tall, narrow stockpot works well because it reduces evaporation and keeps bones submerged. A wide pot can work too, but you may need to add water more often.
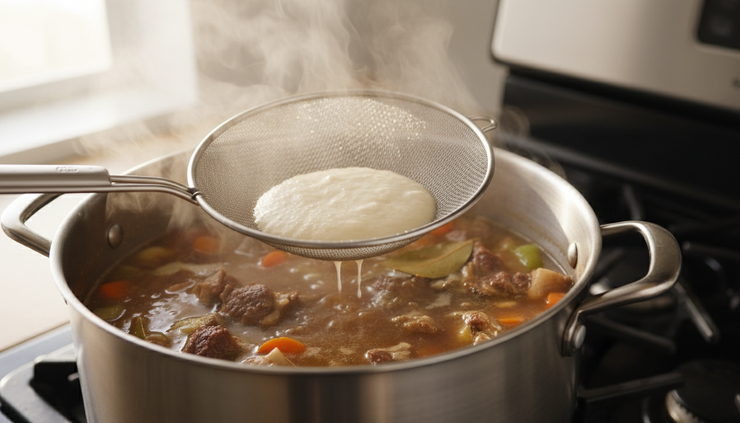
One experienced line cook told me their biggest home upgrade was not a bigger pot. It was a better skimmer. Thin wire skimmers remove foam without taking too much broth with them. That small improvement makes the whole process calmer.
Why blanching is not optional
Blanching bones means boiling them briefly in clean water, draining them, and rinsing them before the real broth begins. It removes blood, loose proteins, and surface impurities that can cloud the soup.
For clear pho, this step matters.
Some cooks skip blanching because they worry it throws away flavor. In practice, the short blanch removes harshness more than flavor. The long simmer that follows does the real extraction.
Here is the chef-style method:
Place bones in a large pot and cover with cold water.
Bring to a strong boil.
Boil for 10 to 15 minutes.
Drain the bones.
Rinse bones under warm water.
Scrub off dark residue if needed.
Wash the pot before starting the broth.
That last step matters. If the pot has scum stuck to the sides, it can wash back into your broth.
A step-by-step method for deeper pho bone extraction
This process builds clean flavor in layers. It works because every step has a job: clean the bones, open their structure, coax out collagen, add aromatics at the right time, and season near the end.
Step 1. Choose and size the bones
Use a mix of joint bones, marrow bones, and meaty bones. For a large home pot, use enough bones to fill the pot halfway, then cover with water by a few inches.
Ask for bones cut into manageable pieces. Large whole bones extract poorly in a home kitchen because the water cannot reach enough surface area.
Step 2. Blanch and rinse thoroughly
Start bones in cold water, bring them to a boil, and let the impurities rise. Drain and rinse well.
A chef who taught weekend pho classes once said this is the step that shows patience. “If you rush the washing, you taste it at the end.” The broth may still be edible, but it will lack that clean sparkle that makes pho feel light even when it is rich.
Step 3. Start the real broth with clean water
Return the cleaned bones to a washed pot. Add fresh cold water. Bring the pot up slowly, then lower the heat before it turns into a hard boil.
The goal is a quiet simmer. Look for small bubbles breaking the surface, not rolling waves.
High heat breaks fat and protein into tiny particles, which clouds the broth and can make it taste heavy. Gentle heat extracts flavor more cleanly.
Step 4. Char the onion and ginger
Charred onion and ginger give pho its warm backbone. You can do this over a gas flame, under a broiler, or in a dry cast-iron pan.
Char until the outside darkens and the inside softens. Do not burn them to ash. Rinse off loose black flakes if needed.
Add them after the broth has settled into a simmer.
Step 5. Toast and contain the spices
Common spices include star anise, cinnamon, cloves, coriander seed, fennel seed, and black cardamom. Toast them briefly in a dry pan until fragrant.
Keep the spices in a bag or infuser. This prevents small fragments from floating through the soup and makes it easy to remove them before they dominate the broth.
Spices should support the bones, not cover them.
Step 6. Simmer slowly and skim often
Let the bones simmer for several hours. Beef bones need a long cook to release collagen and flavor. Chicken broth takes less time, but still benefits from gentle heat.
Skim foam early. Skim fat later if it becomes excessive. Some fat is good because it carries aroma, but a thick slick on top can dull the bowl.
Keep bones covered with water. Add hot water if the level drops too much. Cold water can slow the simmer and change the rhythm of extraction.
Step 7. Season near the end
Salt, fish sauce, and rock sugar or another mild sweetener should usually go in near the end. If you season heavily at the start, reducing broth can make it too salty.
Seasoning late also helps you judge balance. The broth should taste savory, gently sweet, aromatic, and beefy before it ever touches noodles.
This is where you Learn the art of bone extraction mastery for pho soups by tasting carefully. Extraction gives the broth its body. Seasoning gives it shape.

Chef habits that maximize flavor without muddying the broth
Great broth comes from restraint as much as effort. The goal is not to extract everything at any cost. The goal is to extract the right flavors.
Keep the simmer gentle
A rolling boil may seem productive, but it often leads to cloudy broth and greasy texture. Chefs keep the pot barely moving. That slow pace lets collagen dissolve while solids settle.
If the broth starts bubbling hard, lower the heat and skim.
Do not overload the spice mix
Too much star anise or cinnamon can make broth taste medicinal. Toast spices only until fragrant. Long, aggressive toasting can turn them bitter.
Many restaurant cooks add spices for only part of the simmer rather than the full cook. That keeps the aroma bright and controlled.
Use fish sauce with care
Fish sauce brings savoriness, but too much can push the broth toward sharp and salty. Add a small amount, taste, then adjust.
A good bowl should not taste like fish sauce. It should taste more complete because of it.
Save some fat, remove the excess
Fat carries flavor from spices and aromatics. Removing every drop can make broth taste thin. Leaving too much can make it feel heavy.
The chef move is to skim aggressively when the fat layer gets thick, but leave a light sheen.
Rest and strain before serving
After simmering, let the broth settle briefly off heat. Then strain it through a fine-mesh strainer. For a very clear broth, strain again through damp cheesecloth.
Do not press hard on the solids. Pressing can force cloudy particles into the broth. Let gravity do the work.
Common mistakes can flatten even good bones
Most pho problems come from a handful of habits. Fix these and the broth improves fast.
Skipping the bone cleaning step
Unwashed bones can leave a gray, murky broth. Blanch, rinse, and clean the pot before the real simmer.
Using only marrow bones
Marrow tastes rich, but it does not create enough structure on its own. Add knuckle, neck, or tendon-rich bones for depth.
Boiling hard for hours
Strong boiling can emulsify fat and solids into the broth. Keep it calm.
Adding spices too early and leaving them too long
Spices can overpower the broth. Toast them lightly, contain them, and remove them when the aroma tastes balanced.
Seasoning heavily at the start
Water evaporates as broth cooks. Early salt can become too strong later. Season near the end.
Crowding the pot
Bones need water movement around them. If they pack tightly, extraction becomes uneven. Use a larger pot or reduce the bone load.
Ignoring the final taste
Broth changes as it cooks. Taste before serving and adjust in small steps. Add salt for clarity, fish sauce for savoriness, sugar for roundness, and hot water if the broth feels too intense.

The final bowl should taste layered, not loud
Perfect extraction shows up in the bowl before any garnish. The broth should look clear or gently amber. It should smell of beef, charred ginger, warm spice, and onion. It should feel light at first, then leave a savory finish.
When the noodles, herbs, sliced beef, lime, and chiles go in, the broth should still lead. That is the reward for careful bone work.
One chef described the best test as the “second sip.” The first sip tells you if the seasoning is right. The second tells you if the bones gave enough. If you want another spoonful before adding anything else, the extraction worked.
The next time you make Pho, treat the bones as the main ingredient, not the background. Choose a balanced mix, clean them well, simmer gently, and season with patience. Better broth is rarely about one dramatic trick. It comes from a chain of small, careful choices, each one making the final bowl deeper, cleaner, and more satisfying.


Comments